Examples |
ASP.NET Developer's Guide
- Getting Started
- Installation
- Adding InnovaStudio .NET WYSIWYGEditor to Visual Studio Toolbox
- Using the Editor in a Web Form
- Loading Content into the Editor
- Setting the Editor Dimension
- Applying Stylesheet
- Using Asset Manager Add-on
- Advanced Settings
- Extending the Editor
- Toolbar
- Localization
- FAQ
I. Getting Started
I.1. Installation
Unzip the Editor package & copy all files into your web server.
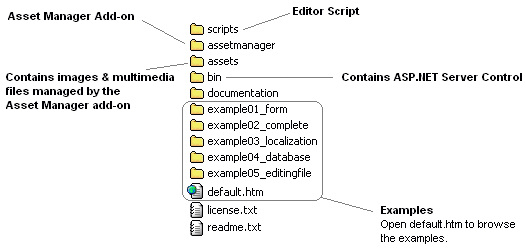
You should have the following folders and files:

Open file default.htm to
browse the examples and the documentation.
According to several examples, it is recomended that you copy all files into a virtual directory named
Editor in your web server, so that you can access the examples by opening:
http://yourserver/Editor/default.htm
Note:
InnovaStudio WYSIWYG Editor script is located in scripts folder
and the Server Control (WYSIWYGEditor.dll) is located in
bin folder. To use the Editor in ASP.NET pages,
copy the scripts folder anywhere in your web server and
copy the WYSIWYGEditor.dll into the
bin folder of your website.
I.2. Adding InnovaStudio .NET WYSIWYGEditor to Visual Studio Toolbox
- Copy WYSIWYGEditor.dll to folder anywhere in your file system for example c:\Program Files\WYSIWYGEditor\dll
- In Visual Studio, select Tools - Choose Toolbox Items...
- In Choose Toolbox Items dialog click Browse button and select the WYSIWYGEditor.dll
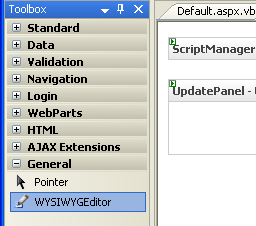
- The WYSIWYGEditor control now available in Visual Studio Toolbox when you starts a web project.

I.3. Using the Editor in a Web Form
- Copy the scripts folder anywhere in your web server (please do not rename it).
- In page design mode, click WYSIWYGEditor control in toolbox and drag to page. Visual Studio will automatically creates
bin folder and copy the WYSIWYGEditor.dll into the folder.
You can also copy the WYSIWYGEditor.dll (located in the
bin folder) into the bin folder of your website manually.
- Register the Server Control in your ASP.NET page. If you drag and drop the control from toolbox, Visual Studio will automatically register the control in the page.
Default TagPrefix is cc1 (or cc2, cc3 and so on). You may want change the TagPrefix
to more meaningful name for example editor.
<%@ Register TagPrefix="editor" Assembly="WYSIWYGEditor" namespace="InnovaStudio"%>
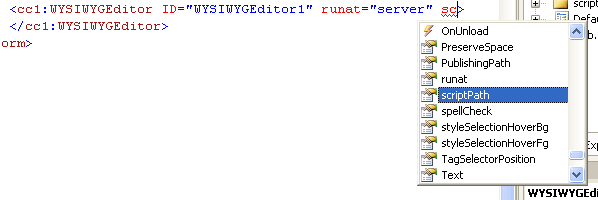
- Visual Studio also creates the editor tag in source view.
<editor:wysiwygeditor
Runat="server"
scriptPath="scripts/"
ID="oEdit1" />
The scriptPath property specifies the location of the
Editor scripts folder.
Below is an example:
<%@ Page Language="vb" ValidateRequest="false" Debug="true" %>
<%@ Register TagPrefix="editor" Assembly="WYSIWYGEditor" namespace="InnovaStudio" %>
<!DOCTYPE HTML PUBLIC "-//W3C//DTD HTML 4.0 Transitional//EN">
<html>
<head>
<meta http-equiv="Content-Type" content="text/html; charset=utf-8">
</head>
<body>
<form id="Form1" method="post" runat="server">
<editor:wysiwygeditor
Runat="server"
scriptPath="scripts/"
ID="oEdit1" />
</form>
</body>
</html>
-
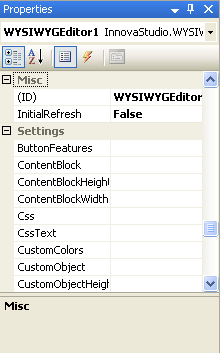
Specify control properties. You can specify control properties from
Properties window or in source view.


I.4. Loading Content into the Editor
To load content into the Editor, use Content property.
Below is an example:
<%@ Page Language="vb" ValidateRequest="false" Debug="true" %>
<%@ Register TagPrefix="editor" Assembly="WYSIWYGEditor" namespace="InnovaStudio" %>
<!DOCTYPE HTML PUBLIC "-//W3C//DTD HTML 4.0 Transitional//EN">
<html>
<head>
<meta http-equiv="Content-Type" content="text/html; charset=utf-8">
<script language="VB" runat="server">
Sub Page_Load(Source As Object, E As EventArgs)
If Not Page.IsPostBack Then
oEdit1.Text = "<h3>Hello World!</h3>"
End If
End Sub
</script>
</head>
<body>
<form id="Form1" method="post" runat="server">
<editor:wysiwygeditor
Runat="server"
scriptPath="scripts/"
ID="oEdit1" />
</form>
</body>
</html>
I.5. Setting the Editor Dimension
Editor dimension can be adjusted using the Width and
Height properties. For example:
<editor:wysiwygeditor
Runat="server"
scriptPath="scripts/"
Width="100%"
Height="350"
ID="oEdit1" />
Please note that by default, you can't set the Editor width less than 565 pixels.
To set the Editor width less than 565 pixels, you'd need to apply toolbar line breaks using
ButtonFeatures property. More info
© 2008, INNOVA STUDIO (www.innovastudio.com). All rights reserved.


